


Volunteer Invitation Preparation
1. Log into your PMC Dashboard.
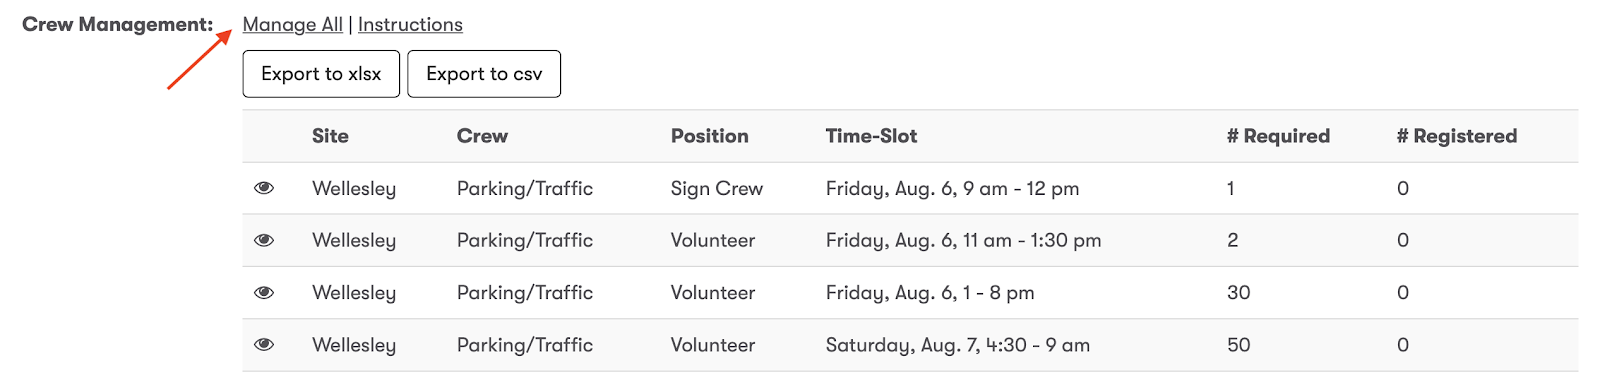
2. On your Crew page (found in the left hand menu), download the list of required positions by clicking either “Export to xlsx” or “Export to csv.” This spreadsheet shows the number of required and registered volunteers for each position for this year.

3. On your Crew Management page (also found under Crew in the left hand menu), download your list of past volunteers by clicking “↓ Excel.” This spreadsheet shows your volunteers from the previous year, including their crew, position, time slot, current year’s registration status, and contact information.

4. Once you have both spreadsheets available, take notes on your spreadsheet of past volunteers (from step 3) to fulfill the number of required volunteers for each position and time slot. Use the spreadsheet of required positions (from step #2) to guide you.
For instance, if a crew requires 10 volunteers for a time slot, select 10 people on your past volunteers spreadsheet and make a note that you would like to invite those volunteers for this year's PMC. Take notes in a blank column on the spreadsheet, highlight their names in a specific color, cut and paste their names into a separate sheet – do whatever works for you to organize your notes!
This step is not required but highly recommended so that you can organize your volunteers before setting up invitations in your PMC crew management tools.

Invitation Process
5. Once you have your notes organized to determine which volunteers you would like to invite to which positions for this year's PMC, click Manage All on the Crews page.
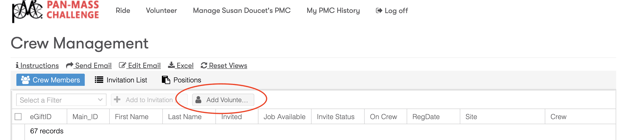
6. Once on your Crew Management page, you will be in the default view, “Crew Members.” This view shows your crew members and their position(s) from the previous year. The other views are “Invitation List” and “Positions.”
Crew leaders will see volunteers for just their crew. Site leaders will see volunteers for all crews at their site. You can sort volunteers by any of the columns in this view, such as “Job Available,” “Invited,” “Crew,” etc.
On the “Crew Members” view, select one or more individuals to begin the invitation process by clicking in the box next to their egift ID. Use your notes from the preparation stage to guide you here.
If an individual held multiple volunteer jobs last year, you will see their name appear multiple times.


7. Once you have selected the individuals you want to invite, click “+ Add to Invitation,” which will become clickable once you have at least one volunteer record selected. This will add the volunteer to your “Invitation List.”
If the position is available for the current year (see “Job Available” column), you will see a confirmation message that the job has been added to your “Invitation List.” You can confirm this by clicking “Invitation List” next the “Crew Members.”

If the position is not available for the current year (see “Job Available” column), you will see a message prompting you to select a new position for the volunteer.

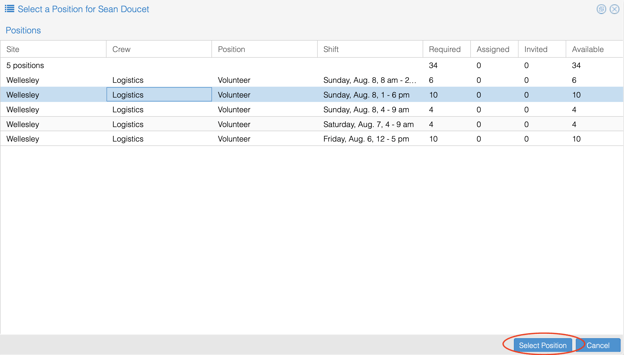
Click “Yes” to select a new job. At this step, you will see a full list of jobs for your crew or site, along with the number of volunteers required, assigned to (those already registered), invited, and available for each position.
Click on a position on this list that does not have too many volunteers invited or assigned to it, then click “Select Position” to add it to the “Invitation List.” You will see a message confirming the addition.


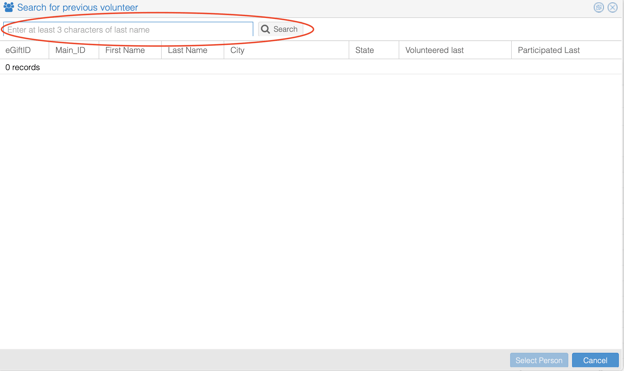
8. If you have additional volunteers to invite who were not registered for last year's PMC, use the "Add Volunteer" button to search for individuals who have participated in past PMCs.
Type a volunteer's name in the available field and click "Search." The search results will show the individual's name, city and state, and years last volunteered and participated as a rider.
Once you find the individual you were search for, click "Select Person" to choose a position for them. Once you have identified the position for them, click "Select Position." This will add the volunteer to your "Invitation List" with all of your previous year's volunteers who are also being invited to volunteer for the current year.
9. As you work, review your “Invitation List.” If you need to remove any invitations on this page, select the volunteer by clicking in the box next to their egift ID. Click “Remove Selected Job.”

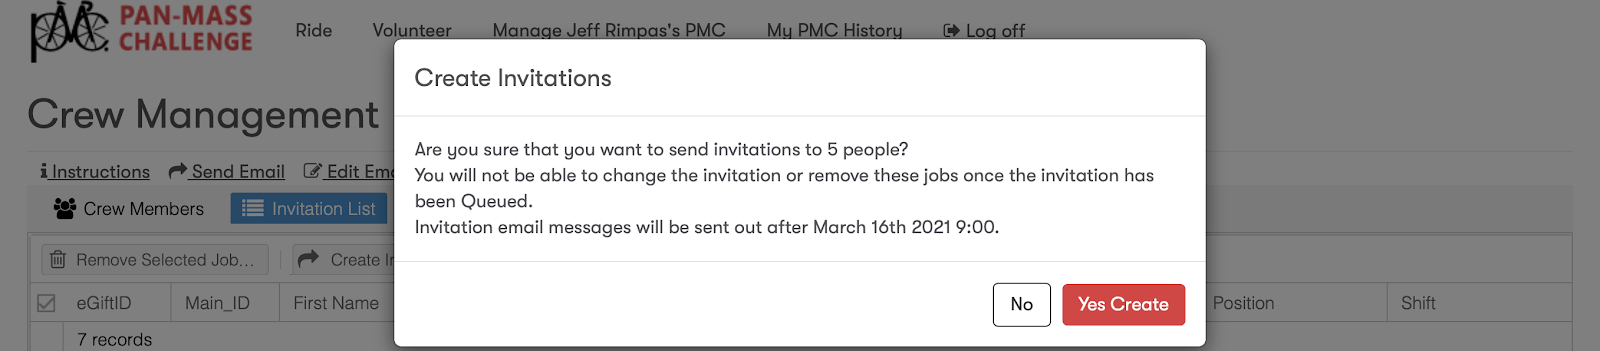
10. Once you have reviewed your “Invitation List,” click “Create Invitations.”
Once you click “Create Invitations,” you will not be able to change the volunteer’s position. If you do this accidentally, please contact PMC Volunteer Justine Darmanian at justine@pmc.org
Email Instructions
1. On your Crew Management page in your PMC Dashboard, click "Edit Email." This will display your previously sent emails, which are saved for future editing/sending. (If you have no previously sent emails, you will see a blank message for you to begin drafting your first email to your volunteers.)

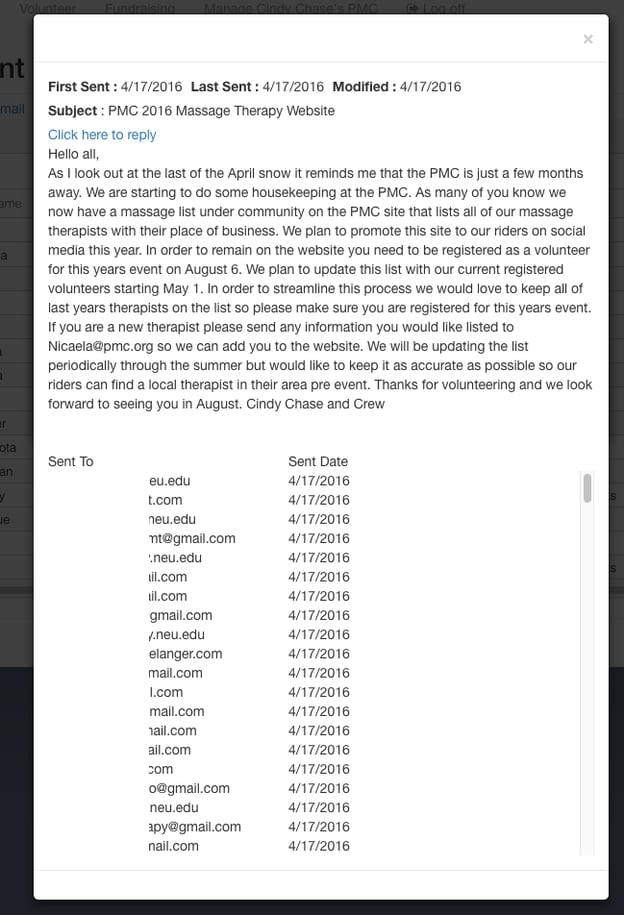
2. Click on the envelope icon next to a subject line to view the message and the list of volunteers who received it.
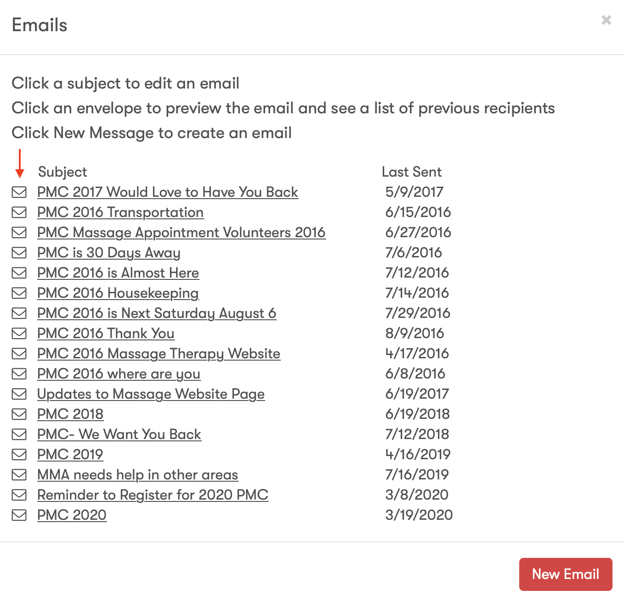
3. To use one of these previously sent emails as the starting point for a new email, click on the subject line.

To start a new message, click "New Email" in this window. This will open a blank message for you to draft your message.
You can also create a new message on the main Crew Management page without clicking "Edit Email." Select the contacts you would like to send a message to by clicking in the box next to their egift ID and then click "Send Email." This will open a blank message for you to draft your message; it will not automatically send an email to your selected contacts.
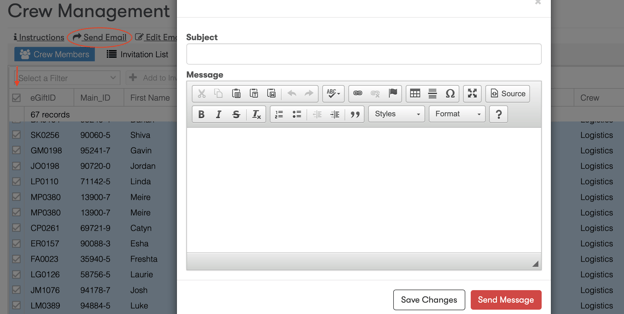
Once you update an existing email or draft a new email, save your work by clicking "Save Changes" below the body text.
4. Now select the volunteers you would like to send your email to. The default view shows all contacts and you can sort by filters, such as "registered this year," "not on crew this year," etc. You can select contacts one at a time by clicking the box next to their egift ID or you select all contacts by clicking the box in the header next to the label "eGiftID."

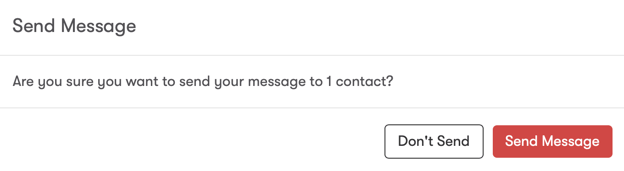
5. After selecting your contacts, click on your email message and then click "Send Message." You will be prompted to confirm and click "Send Message" a second time.